A Braided Cat Ear Beanie (Inspired by Frank, Obviously)

etsy cat ear beanie images

Some projects start with a sketch.

Some start with yarn.

And some—like this one—start with a very majestic, very fluffy, long-haired ginger cat who looks at you like he absolutely knows he’s the inspiration.

cat ear beanie 4
Meet Frank. 🧡

He is floofy. He is regal. He has opinions. And his luxurious coat was 100% the spark behind this braided cat ear beanie.


I wanted something cozy and playful– I wanted to take an old favorite and add a little oomph to it. A little understated elegance, just like Frank.

Why Half Double Crochet Has My Heart

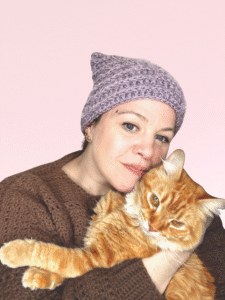
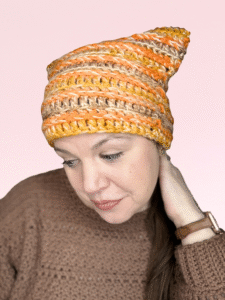
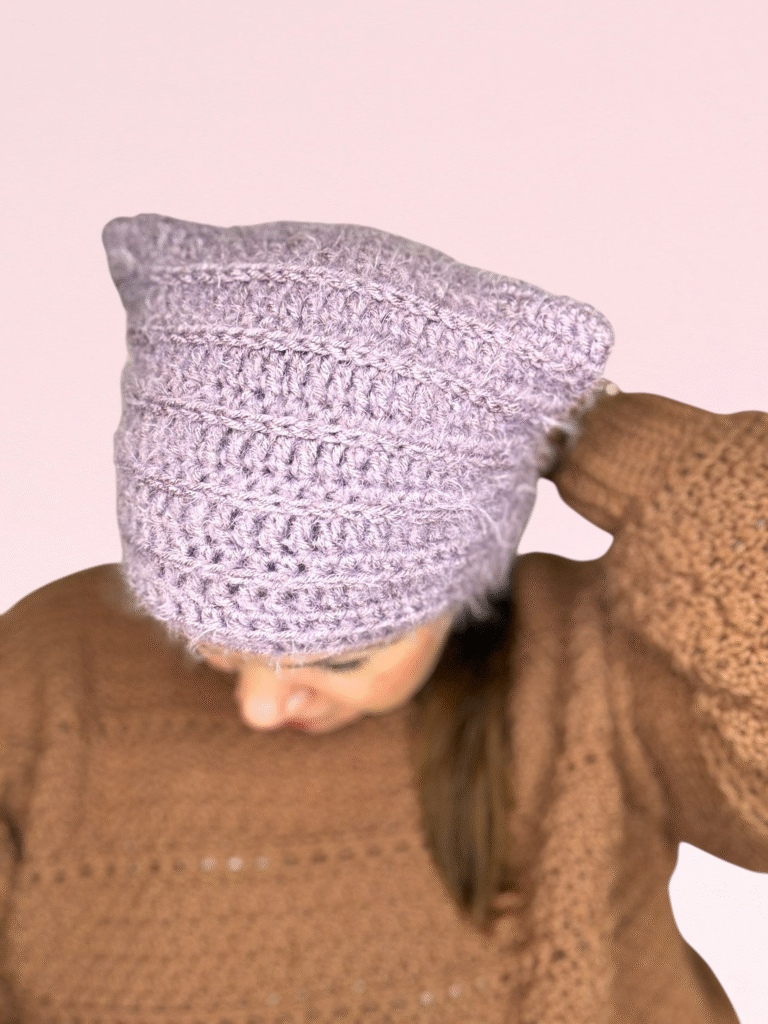
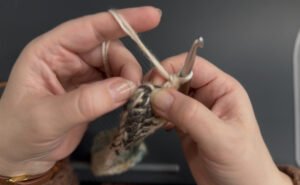
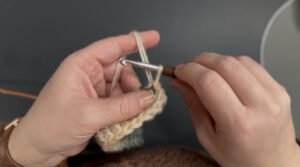
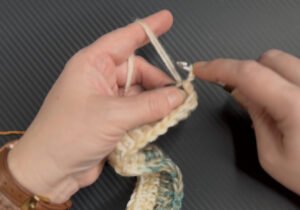
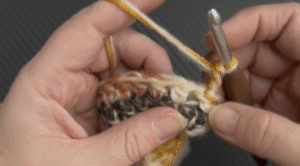
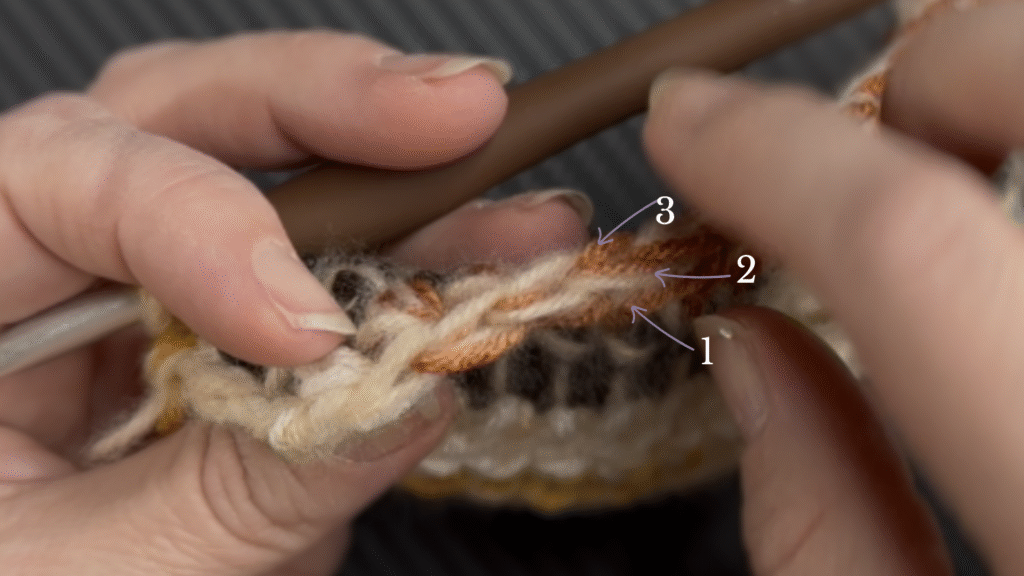
There’s something about hdc that scratches an itch in my brain. It works up quicker than sc and doesn’t require as many movements as dc! Most importantly, it has the third loop.

For this beanie, I leaned hard into half double crochets
worked into the third back loop
, which is where the magic happens. That
subtle shift creates a gorgeous braided, corded texture that looks far
more complicated than it actually is. It adds depth without stiffness,
definition without bulk—and when paired with fluffy or eyelash yarns? Absolute
perfection.

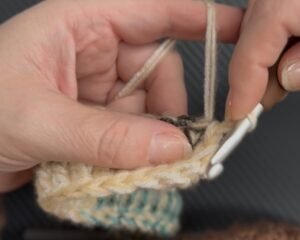
The braid catches the light.
The fluff softens the edges.
It’s tactile, cozy, and just a little bit fancy.

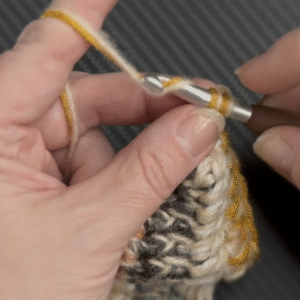
Fluffy Yarn = Maximum Drama (in the Best Way)

This hat is no-sew (yes, really—no sewing the ears on
afterward 🎉), which makes it even more satisfying when
working with yarns that don’t like being fussed with.

Some versions of this beanie were made holding two
strands together
:

6
Frank-colored!
  • One strand of Hobbii Jade yarn the whole way through for the floof factor
  • One strand of a solid or variegated worsted-weight acrylic (I mixed and matched a lot)

That combo gives you structure and softness—great stitch definition with a halo of fluff.

But my personal favorite?

Yarn Bee Ethereal Eyelash in Smoked Lavender

It’s dreamy. It’s moody. It has that soft, slightly mysterious glow that makes the braid peek through just enough. If Victorian lavender ghosts wore cat ear hats, this would be it.

cat ear beanie 3

Endless Color Possibilities

One of the things I love most about this design is how flexible it is.

  • Go solid for a sleek, modern look
  • Mix two strands for depth and contrast
  • Use variegated yarn for a playful, chaotic twist
  • Lean into neutrals… or go full goblin mode with color

Every yarn choice gives the hat a totally different personality—which means you can make ten of these and never get bored.

(Ask me how I know.)

Faux Double Crochet

An option I like to use at the start of each round is the faux hdc/dc rather than chaining 2 or 3.

Slipstitch (slst) to join to the indicated stitch.

img 9531

Pull up the loop to the height needed for the hdc/dc

img 9534

Hold the loop in place on top of the hook so it doesn’t slip off.

img 9538

Twist the hook down to the right and under the loop while holding the loop in place.

img 9537

Grab the working yarn and pull through both loops.

img 9546

Completed faux hdc/dc

img 9547

HDC 3BL

Half double crochet creates an extra loop in the back. When indicated, work stitches into this 3rd loop.

hdc 3bl

The Braided Cat Ear Beanie Crochet Pattern

Below is the written pattern for the beanie. If you’d like a beautifully formatted, printable, tablet-friendly version with photos and layout polish, you’ll find a link to purchase the PDF at the end.

Materials

  • Bulky/fluffy yarn or Two strands held together (1 fluffy + 1 worsted weight)
  • 6.0 mm crochet hook
  • Stitch marker (optional but helpful)
  • Scissors
  • Yarn needle

Abbreviations


  • st – stitch
  • ea – each
  • rd – round
  • ch – chain
  • slst – slip stitch
  • hdc – half double crochet
  • dc – double crochet
  • bl – back loop
  • blo – back loop only
  • 3bl – third back loop
  • rep – repeat


Notes

  • Hat is worked starting with a foundation chain and then working around the back of the chain.
  • I like to crochet over my yarn tail as I am working on the back side of the chain.
  • Ears are formed as part of the construction (no sewing!)
  • I also like to use a faux dc instead of ch3 to start each new round – this counts as the first stitch.

Instructions

With a 6.0mm hook, ch32 (or number of chains needed to get a chain of approximately 23mm (9in)

  1. In 3rd ch from hook, dc in ea ch across. When reach starting ch, add a second chain into the back side and ch in ea back ch across. Join with slst to 1st dc. (60 st)
  2. Faux hdc in initial st; hdc in ea st around. Join with slst to bl of faux hdc. (60 st)
  3. Faux dc in initial st; dc in 3rd blo of ea st. . Join with slst to 1st dc. (60 st)

Rep rounds 2-3 until you have 13 rounds total, ending on a row 3. Fasten off and weave in ends.

Printable Pattern PDF

Want this pattern in a clean, printable PDF with step-by-step formatting?

👉 Purchase the printable PDF here:
Download on Etsy
Download on Ravelry

This beanie has quickly become one of my favorites—not just because it’s cozy and fun, but because every version feels like its own little personality. Much like Frank.

If you make one, I’d love to see it. Extra points if there’s a cat involved. 🐈‍⬛💜

more posts: